One aspect of the Applied Permaculture Project is to collect rainwater for distribution to annuals and perennials in the Compost and Grow zones.
In this article you’ll find the process I use to design the system, acquire the parts, and install everything.
This is shared with the hope that it can be used as a reference to help you design an appropriate rainwater catchment system for your situation. If you do derive some value from this article, please consider making a small donation as an expression of gratitude.
Quick Links
The Site | Hardware | Math Time | Funding | Installation | Conclusion | References
The Site
The site is located in the New Hampshire seacoast region, USDA Zone 5a where we can expect roughly 12 inches of rainfall per season.
Rain will be collected off the barn roof in gutters sloped toward the north side of the barn and directed into strainers mounted to the top of a vertical section of 4” PVC pipe. The PVC pipe will have a T-fitting near the top and extend to the ground with a small drain fitting at the bottom. The column of the pipe fills first collecting any dirt, poop and debris washed off the roof so that by the time the water level in the pipe reaches the T-fitting near the top, the water is clean. The outlet of the T-fitting will direct the clean water into an elevated storage tank. The water in the tanks will be gravity fed to a main irrigation header and then distributed to drip tape located in both perennial and annual beds.
Hardware
This section will cover the design details of the hardware to catch and route water from the barn to the plants.
Gutters and Distribution to Storage
Easier said than done, but the plan is to install gutters on the east side of the barn to collect water from the roof. From the gutters to a downspout filter and first flush diverter. When the first flush diverter fills the water will then get piped to the storage tank.
Roughly speaking, the end state will look something like this:
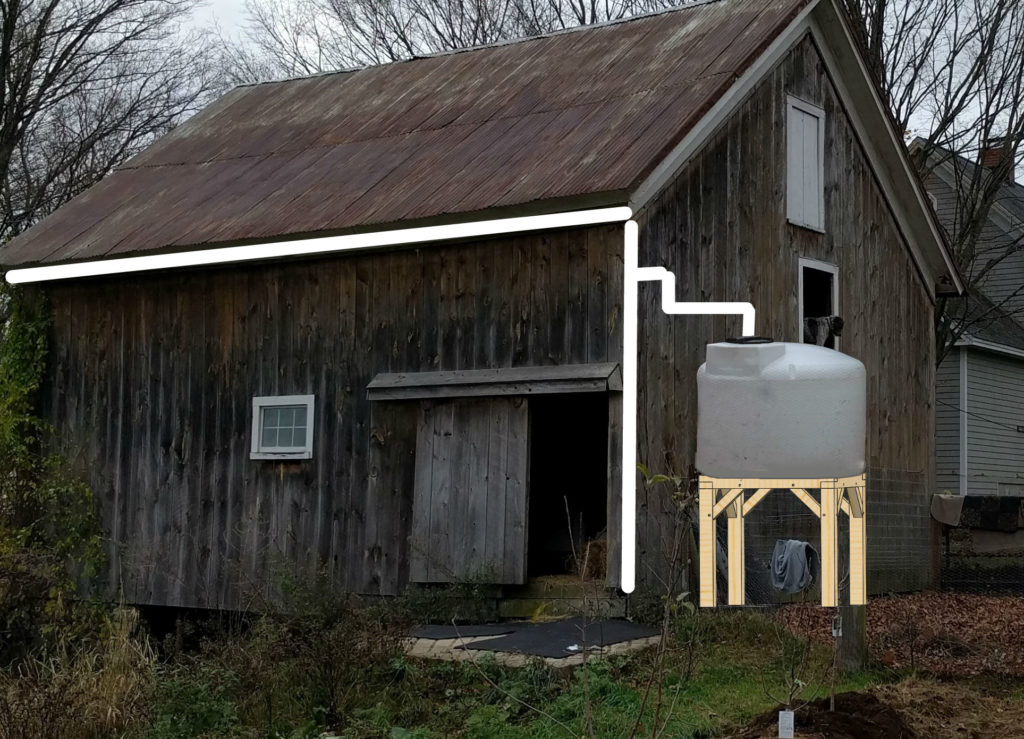
One issue that I’m working around is that my roofing extends well past the fascia. I’ve come up with ideas like building out an extension, or build something out the side of the barn. I also found these T-Bar hangers which secure the gutters right to the roof. I like that, but then I need to figure out how to make sure the gutters slope adequately. Turns out they also have them at Lowe’s. Running down that rabbit hole, I found this solution that provides me a little more certainty that I’ll be able to adjust the slope of the gutters.
The NEXT big problem is: how do I get up there to install the gutters!?
I put feelers out for pump jacks to rent or borrow. Staging is available for rent but the ground would make it a bear to set up. While perusing the rental sites I came across a towable man lift available for rent near me. It’s a little higher dollar than I’d like ($225/day) but it puts the project into the realm of possibility.
Tank and Frame
Through a combination of bold requests, good fortune and generosity, I was able to acquire this 500 gallon tank for no cost.
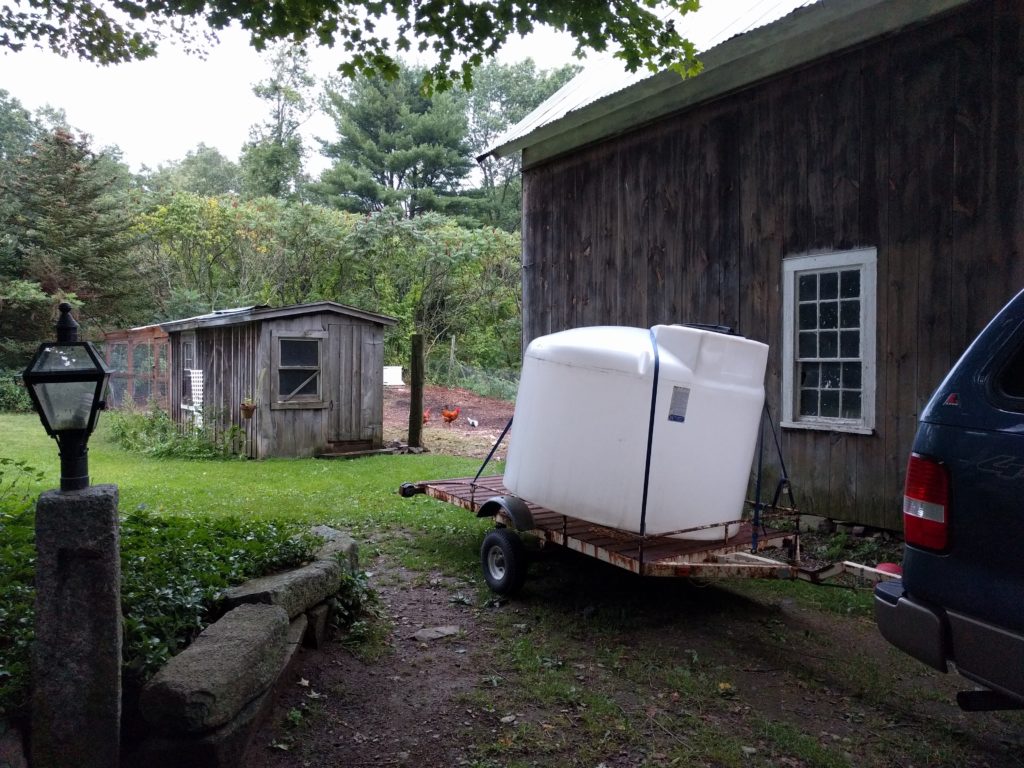
At about 8 pounds per gallon, 500 gallons should come in around 4000 pounds, or two tons. Adds up, eh!
The atmosphere has done all the pumping for me, so in an effort to use only gravity to distribute the water I need to elevate the tank. Using a rule of thumb that every foot equals about 0.43 pounds of pressure, and with a 4 – 10 psi goal for the use of drip tape, I aim to elevate this barrel five to ten feet above the ground.
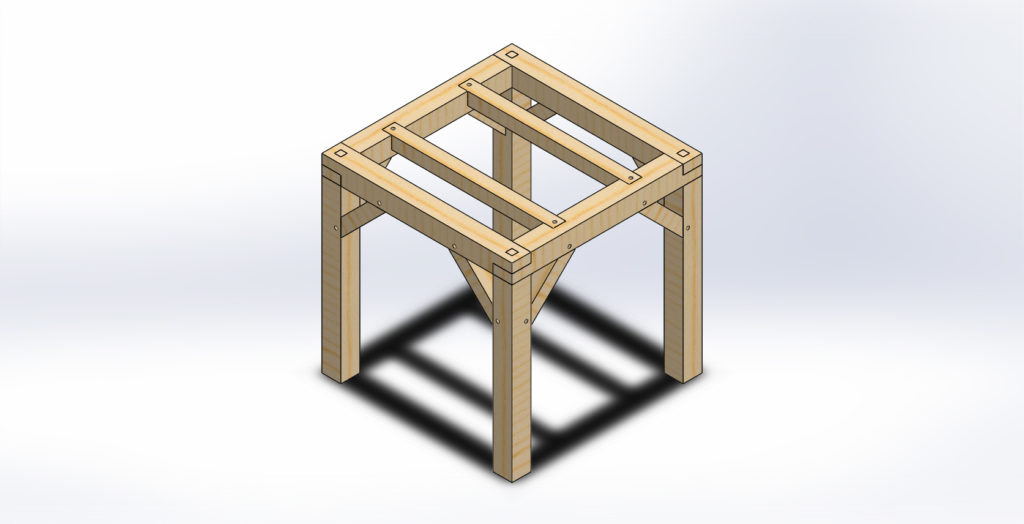
I’m going to use this as an opportunity to practice some timber framing skills and tap into an already primed set of CAD skills by designing and building this timber frame tank stand out of 6×6 pine posts and beams.
Four 6×6 posts give me the warm fuzzy that they will be strong enough, but referencing load capacity tables is always a good idea. It’s reassuring to find the rated load of an 8 foot Douglas Fir 6×6 column is over 27,000 lbs.
In thinking about how I’m going to get the barrel up there, I’m batting around ideas for lashing it to the bucket of my tractor. I’m confident that between the tractor and a couple of able hands we’ll be capable of man-handling that barrel onto the frame.
Irrigation Distribution
The dirtiest water in a tank is at the bottom, the next dirtiest at the top, so I’ll design a way to draw water from a few inches below the surface of the water.
The cleanest water in the tank will be routed to a header with 4 valves to establish 4 zones of irrigation: Swale Perennials, Annuals, Compost Zone and Chickens.
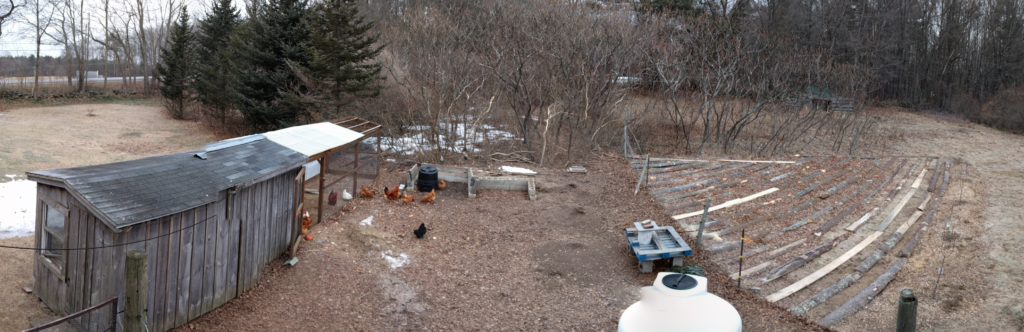
The picture above is taken from the barn looking north. Front and center is the chicken driven compost zone containing 3 apple trees in the solar catchment along the tree line. To the right is a micro-swale on contour with 2 pear trees and 2 apple trees planted along the swale with slabs laid up-slope on contour delineating next season’s rows for a three-sisters annual plot.
Each irrigation zone will receive water through poly irrigation supply line into which flat drip tape will be inserted. The sizing of which will be determined in Math Time.
After studying all the options, I’m considering using this barrel for irrigating my main annual garden too, about 100 feet away, but about another 10 feet lower in grade. I’ll explore this in Math Time, and if it’s possible, this run of pipe might drive my distribution hose size.
Math Time
This section will be used to outline the math required to properly size the system.
First up: Pressure!
You may easily use the rule of thumb that 1 foot of water yields 0.43 psi of pressure. But if you’re like me, you want to prove that out.
$latex P=\rho g h &s=2$
Where static pressure is the product of the density, gravity and height.
$latex P = \Big(63 \frac{lb}{ft^3}\Big) \Big(32.2 \frac{ft}{s^2}\Big) \Big(1 ft\Big) = 2029 \frac{lb}{ft \cdot s^2} &s=2$
Enter the slug
$latex 1 slug = 1 \frac{lb \cdot s^2}{ft} = 32.174 lb &s=2$
Now converting units…
$latex \Big(2029 \frac{lb}{ft \cdot s^2} \Big) \Big(\frac{lb \cdot s^2}{ft}\Big) \Big(\frac{1}{32.174 lb}\Big) = 63.4 \frac{lb}{ft^2} &s=2$
$latex \Big(63.4 \frac{lb}{ft^2} \Big) \Big(\frac{1 ft^2}{144 in^2}\Big) = 0.43 \frac{lb}{in^2} &s=2$
Bam!
It’s gotta be true.
I think it’s important here to point out that the height refers to the surface of the water. So if my stand is five feet up, and the tank fills with 4 feet of water, my pressure is from 9 feet. All this boils down to the fact that I need to get this tank as high as possible while still being able to route clean water into it from the gutters.
How Much Water!
This is fun number to run even if you’re not collecting the water. It’s actually kind of hard to believe how much water falls from the sky.
- The barn dimensions are 33 x 25 feet for a catchment area of 825 square feet.
- With gutters on only one side, the gutter will see half of that, or 413 square feet.
- Some internet searching yielded me an expected rainfall total of 46 inches per year, or roughly 12 inches per season.
- Rule of Thumb: for every 1000 square feet of roof, expect 623 gallons for every inch of rain, or 0.623 gallons per square foot per inch of rain. (Jadrnicek 2016)
So for half of my small barn:
$latex \Big(413 ft^2\Big) \times 46 in \times 0.623 = 11,835~gallons~per~year &s=2$
Or, just for summer:
$latex \Big(413 ft^2\Big) \times 12 in \times 0.623 = 3088~gallons~per~season &s=2$
Numbers like that prove the point that ponds are really the best storage sites, but until I can dig in a pond, I’ll have to do with my 500 gallon tank.
Gutters!
The first step in sizing all the catchment equipment is to gather an idea of how much water to expect, both in inches and in flow rate. This is how I calculated it for my site in the 100 year storm. This process is laid out in more detail, with reference charts in The Bio-Integrated Farm. If you’re crunching numbers here I strongly suggest getting your hands on this book.
- The barn dimensions are 33 x 25 feet for a catchment area of 825 square feet.
- With gutters on only one side, the gutter will see half of that, or 413 square feet.
- From This Link I can see that I should design for 2.5 inches per hour of rain in the 1 hour 100 year storm event.
- Rule of Thumb: for every 1000 square feet of roof, expect 623 gallons for every inch of rain, or 0.623 gallons per square foot per inch of rain. (Jadrnicek 2016)
- Determine the flow rate for these conditions:
$latex \Big(Catchment~Area \times Inches~of~Rain \times 0.623 \Big) \div 60~minutes &s=2$
So, for my case:
$latex \Big(413 ft^2 \times 2.5 \frac{in}{hr} \times 0.623 \Big) \div 60 min = 10 gpm &s=2$
Using a chart in The Bio-Integrated Farm, I can see that for a 3 inch per minute rain event, a five inch gutter should be able to transfer the water falling on 1172 square feet of roof with gutters angled at 1/8th inch per foot.
That just serves as a check in the box, and confirmation that I don’t have to get too aggressive at sloping 5 inch gutters in my application.
I can also confirm in that book that a downspout of 2 inches or greater will be able to transfer my 10 gallons per minute of flow.
The piping leading from the gutters to the tank is sized at 4″ PVC largely because that is a good way to get a sufficient first flush diverter volume. For reference, 10 feet of 4 inch pipe can hold 6.7 gallons.
Irrigation Line!
It is smart to apply at least little thought to the irrigation lines, both header and drip, especially with a gravity fed system, so that you can know with some assurance that there will be enough pressure throughout the system to push the water out of the emitters.
Funding
Parts and cost for rainwater collection and transport to storage:
| Item | Qty | Cost | Notes |
|---|---|---|---|
| Gutters - 10' | 3 | $7 | Lowes Gutters |
| Gutter Hangers | 3 | $10 | Lowes Gutter Hangers |
| Gutter Seamer | 3 | $6 | Lowes Seamer |
| Gutter Drop | 1 | $8 | Lowes Gutter Drop |
| Downspout Elbow | 2 | $3 | Lowe's Downspout Elbow |
| Downspout Extension | 1 | $3 | Lowes Downspout Extension |
| Downspout Filter | 1 | $30 | Rain Harvesting Downspout Filter |
| First Flush Diverter | 1 | $35 | Rain Harvesting 4 inch diverter |
| PVC Pipe 4" Dia - 10' long | 4 | $24 | Lowes PVC Pipe |
| PVC 4" Elbows | 4 | $13 | Lowes PVC Elbows |
| Pipe Clamps | 2 packs of 5 | $10 | McMaster Pipe Clamps |
| Running Tally | $316 |
Parts and cost for tank frame construction and installation:
| Description | Quantity | Cost |
|---|---|---|
| 6 x 6 x 60 Post | 4 | $80 |
| 6 x 6 x 60 Beam | 4 | $80 |
| 4 x 4 x 24 Brace | 8 | $20 |
| 4 x 4 x 54 Cross Member | 2 | $15 |
| 2' Sauna Tube | 4 | $20 |
| 50 lb Concrete | 8 | $25 |
| Post Base | 4 | $80 |
| Stain - Gallon | 1 | $30 |
| Total Frame Cost | $350 |
Installation
Lessons Learned Installing Cheap Gutters: Post | Video
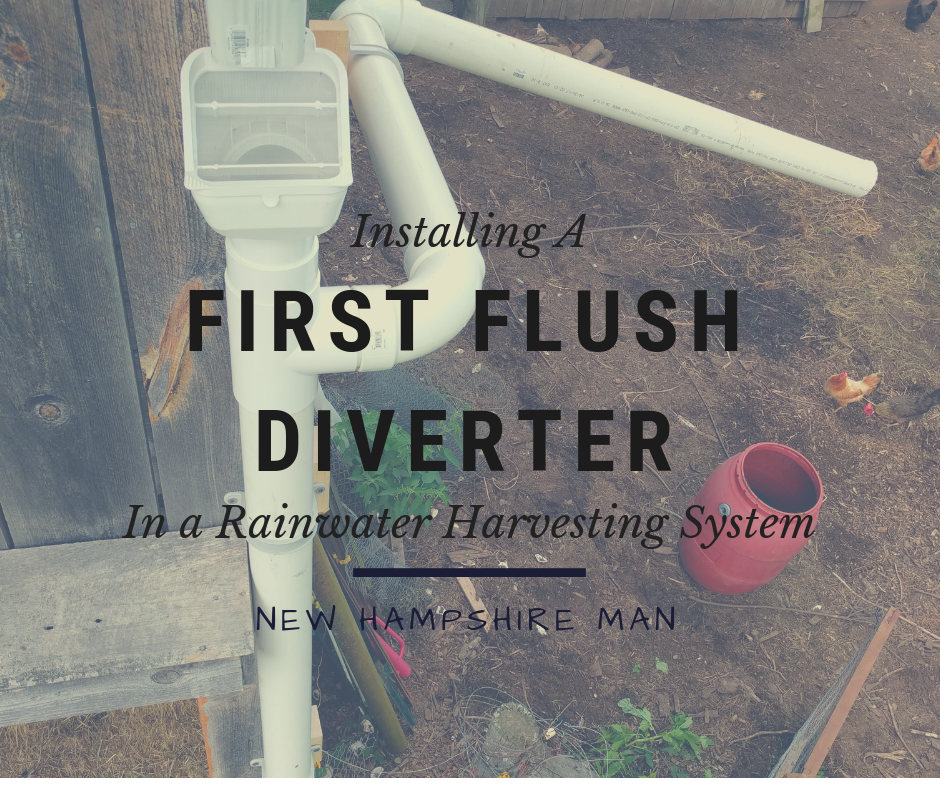
Installing a First Flush Diverter: Post | Video
Conclusion
Can’t write this until it’s concluded.
References
A collection of all the resources utilized to build this system.
Rain Harvest Systems: A thorough selection of parts to piece together the first stage of rainwater catchment; catching and storing the rain.
Irrigation King: A seemingly heavy hitting irrigation product source. I anticipate using this source for drip tape, valves, and header pipe.
Drip Depot: Another source for all the components downstream of the storage tank.
The Bio-Integrated Farm: This book is awesome in a lot of ways, but it is largely to blame for my incessant fascination with capturing rain and using it for irrigation.
Pixlr: Online photo editing software that I used to illustrate some ideas.
[sibwp_form id=2]
0 Comments