In the spring of 2018 I installed gutters on my barn as part of a bigger rainwater harvesting irrigation project. I did enough research to know that the seamless gutters installed by a professional are the best choice, but since I only have as much money as I make sharpening knives, I chose to go the cheap way.
In this article I share some project commentary and lessons learned installing cheap gutters.
Background
From the deepest philosophical perspective, if there’s one thing that our grandchildren may look back on us with amazed curiosity, it might be with regard to our disrespect of water. Like how we treat rainwater as a problem and engineer ways to expedite it’s return to the ocean.
From a more utilitarian perspective, I grow a lot of food and prefer to place as minimal a strain on my well system as possible. In practice, I’m convinced the weakest point in my food growing system is adequate watering at the germination stage of growing. I just suck at making the time to get out there every evening to water the seeds and seedlings.
As I design solutions to any problem, I try to think of ways to automate as much as possible. These are the reasons I designed a rainwater harvesting system that captures the water from my barn, channels it into an elevated tank where gravity takes it through automated valve and piping to drip tape laid exactly where I need water. The whole project, including the design, is located here:
The first step in implementing this design is to install the gutters. The gutters and first flow diverter will drive how high I can elevate my tank.
Why I Chose Cheap Gutters
I did a decent amount of research, having never installed gutters, and I am convinced that in almost all situations the professionally installed seamless gutters are the way to go. This project, however, is funded on a boot string, on the back side of my barn, with no real repercussions if it fails. So, to save a dime, and to hopefully still get the job done, I installed the cheap gutters available from box stores, in this case, Lowe’s.
How Much are Cheap Gutters
My barn is 30 feet long and I’m capturing rain from only one side, so for this project I purchased:
- Three 10’ sections of gutters
- Sixteen gutter hangers
- A Downspout
- Caps for both ends
- Four Seamers to connect the gutter sections
- Hardware: Rivets and #10 nuts and bolts
I purchased the equipment at Lowe’s and paid $85 bucks after their 10% military discount.
I tried to get a quote and work a deal with a local gutter hanger. He wrote me back after my first email and then never responded again. I didn’t dig much deeper than that because I’m cheap.
Installing Cheap Gutters
I’m just going to cover the highlights here with the lessons learned. If I left out something that is important to you, please feel free to contact me.
Snapping a Line
In my situation, the gutter hangers get installed to the overhanging roof. At first, I snapped a line to mark the top of each hanger with, what I thought was, a modest drop in the desired direction so the water would flow correctly. Thankfully, I checked the line with a level. It was WAY off. Why? Because my barn is crooked.
To compensate for the crooked barn I had to hang one end as low as possible and then run the other end as high as possible. I checked it again with a level and found it was good enough, because that’s all I was going to get.
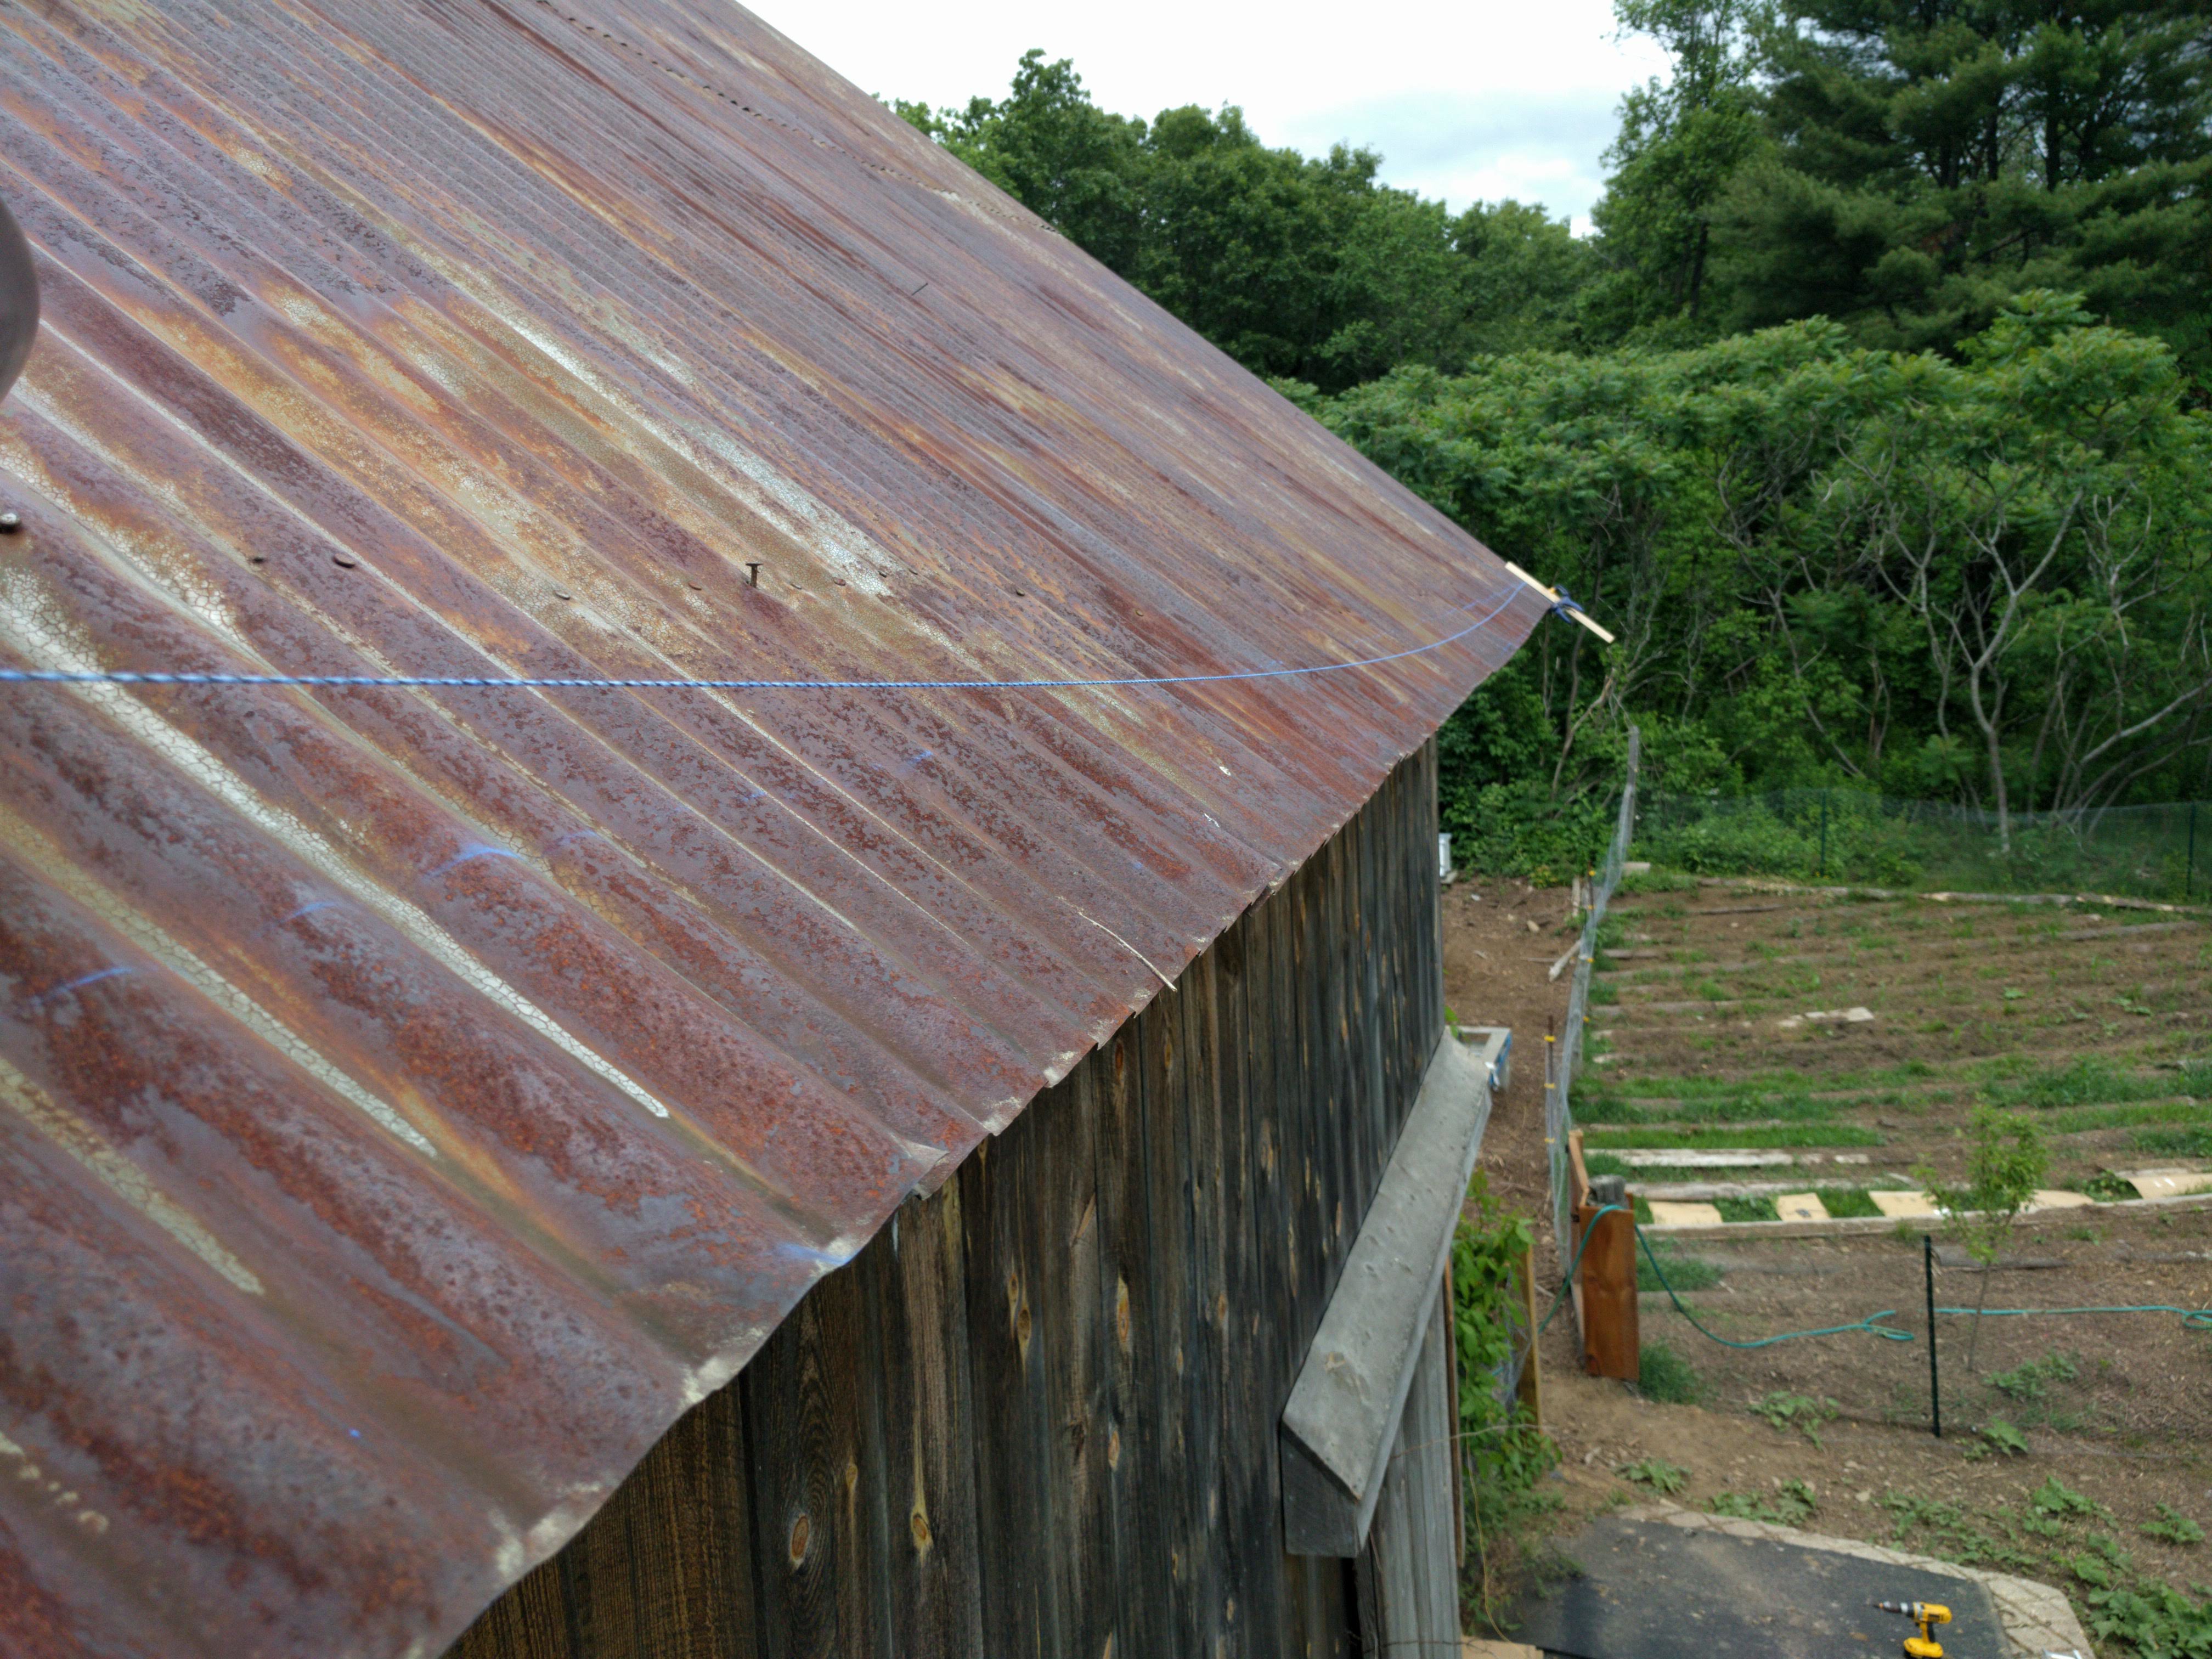
Snapping a line for the hangers, then check the line with a level.
Installing Hangers
My roof overhangs the barn substantially, so the hangers got bolted right to the overhanging roof. The hangers came with nails, but nails would have been a terrible choice. I used #10 screws and nuts to attach the hangers to the roof.
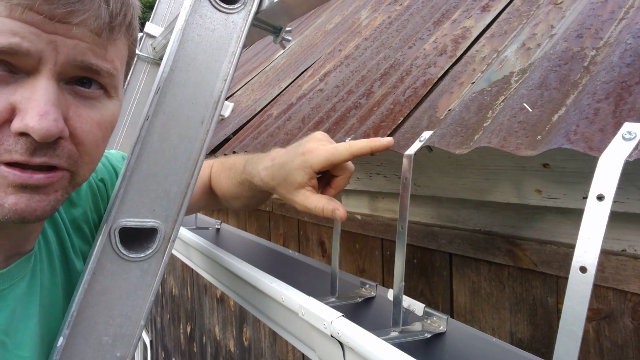
Using nuts and bolts to secure the hangers, instead of the nails supplied with the hangers.
The snapped line served as my marker for installing hangers down the length of the roof. It’s worthy to note that the hangers should be installed before it rains. I mention it because I almost learned that the hard way.
Installing Gutters on Hangers
The gutters are designed to snap in, but I didn’t trust it. For that reason, the back of the hanger gets a sheet metal screw through the hanger (by design) but I also riveted the front of the gutter to the hanger. Some would say it looks terrible, I would agree, which I why I would not recommend using cheap gutters on anything that is supposed to look good.
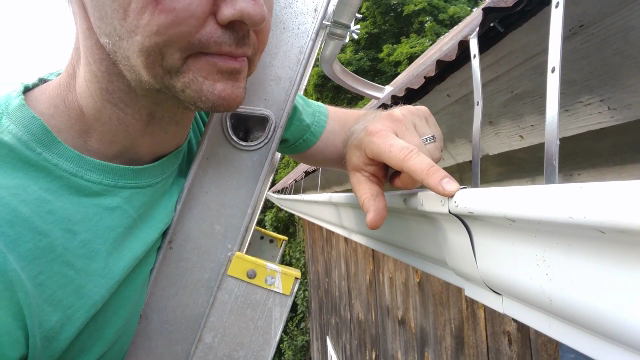
Rivets connecting the front of the gutter to the hanger, the belts and suspenders of cheap gutters.
Connecting the Gutters
The seamer goes over the outside of gutters where two sections of gutter are to be joined. The back-side folds over to hold the seamer in place and some goop goes on the inside to keep it from leaking. I learned that they leak bad without the goop, and that it’s best to apply the goop before the gutters see any rain. The goop doesn’t stick as well to the gutter if they are not clean.
If I had to place a wager, I’d say the seams are going to leak. Maybe this year, maybe next year, but odds are it’ll happen. Another good reason to not use these gutters for most applications.
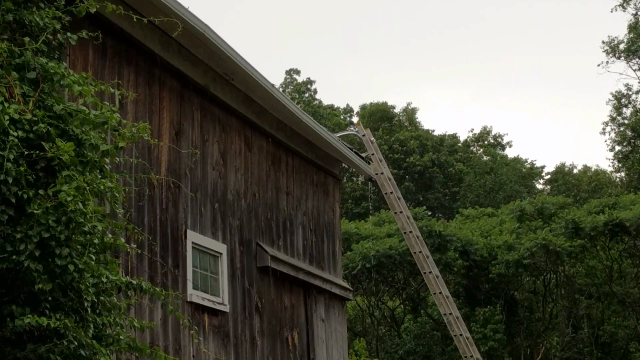
Getting Up There
I struggled with this for a while. Installing gutters from a ladder is cheap, and a pain in the ass compared to staging, pump jacks or a man lift. I found a neighbor with pump jacks, but he didn’t let me borrow them. I found a rentable, towable, man-lift, which would have been sweet, but the rental cost was $230 per day, which I just couldn’t bring myself to spend on this project. But again, if you are doing a bigger project that warrants higher quality, the man-lift is a good option.
Ultimately, I did it from a ladder, which cost me nothing other than a little sweat and anxiety. Well. I did have to purchase on critical attachment for my ladder, a ladder standoff to keep the ladder from resting up against the gutters.
A little added bonus in alignment with everything else I teach at NHM, the sore body after going up and down the ladder, and moving it so many times, was indicative of the killer full body workout I got installing these gutters.
That’s It!
Nothing to it but to do it.
First rain after installation assured me that good enough looks good enough.
Gutters are up, they don’t look magical, but after the first rain they were working. Make sure you subscribe to my newsletter, or bookmark THIS PAGE to see how the rest of the project goes, such as:
- Installing the downspout, filter and first flush diverter.
- Building a post and beam frame for the tank
- Installing the tank
- Building out all the piping and drip tape.
See you next time!